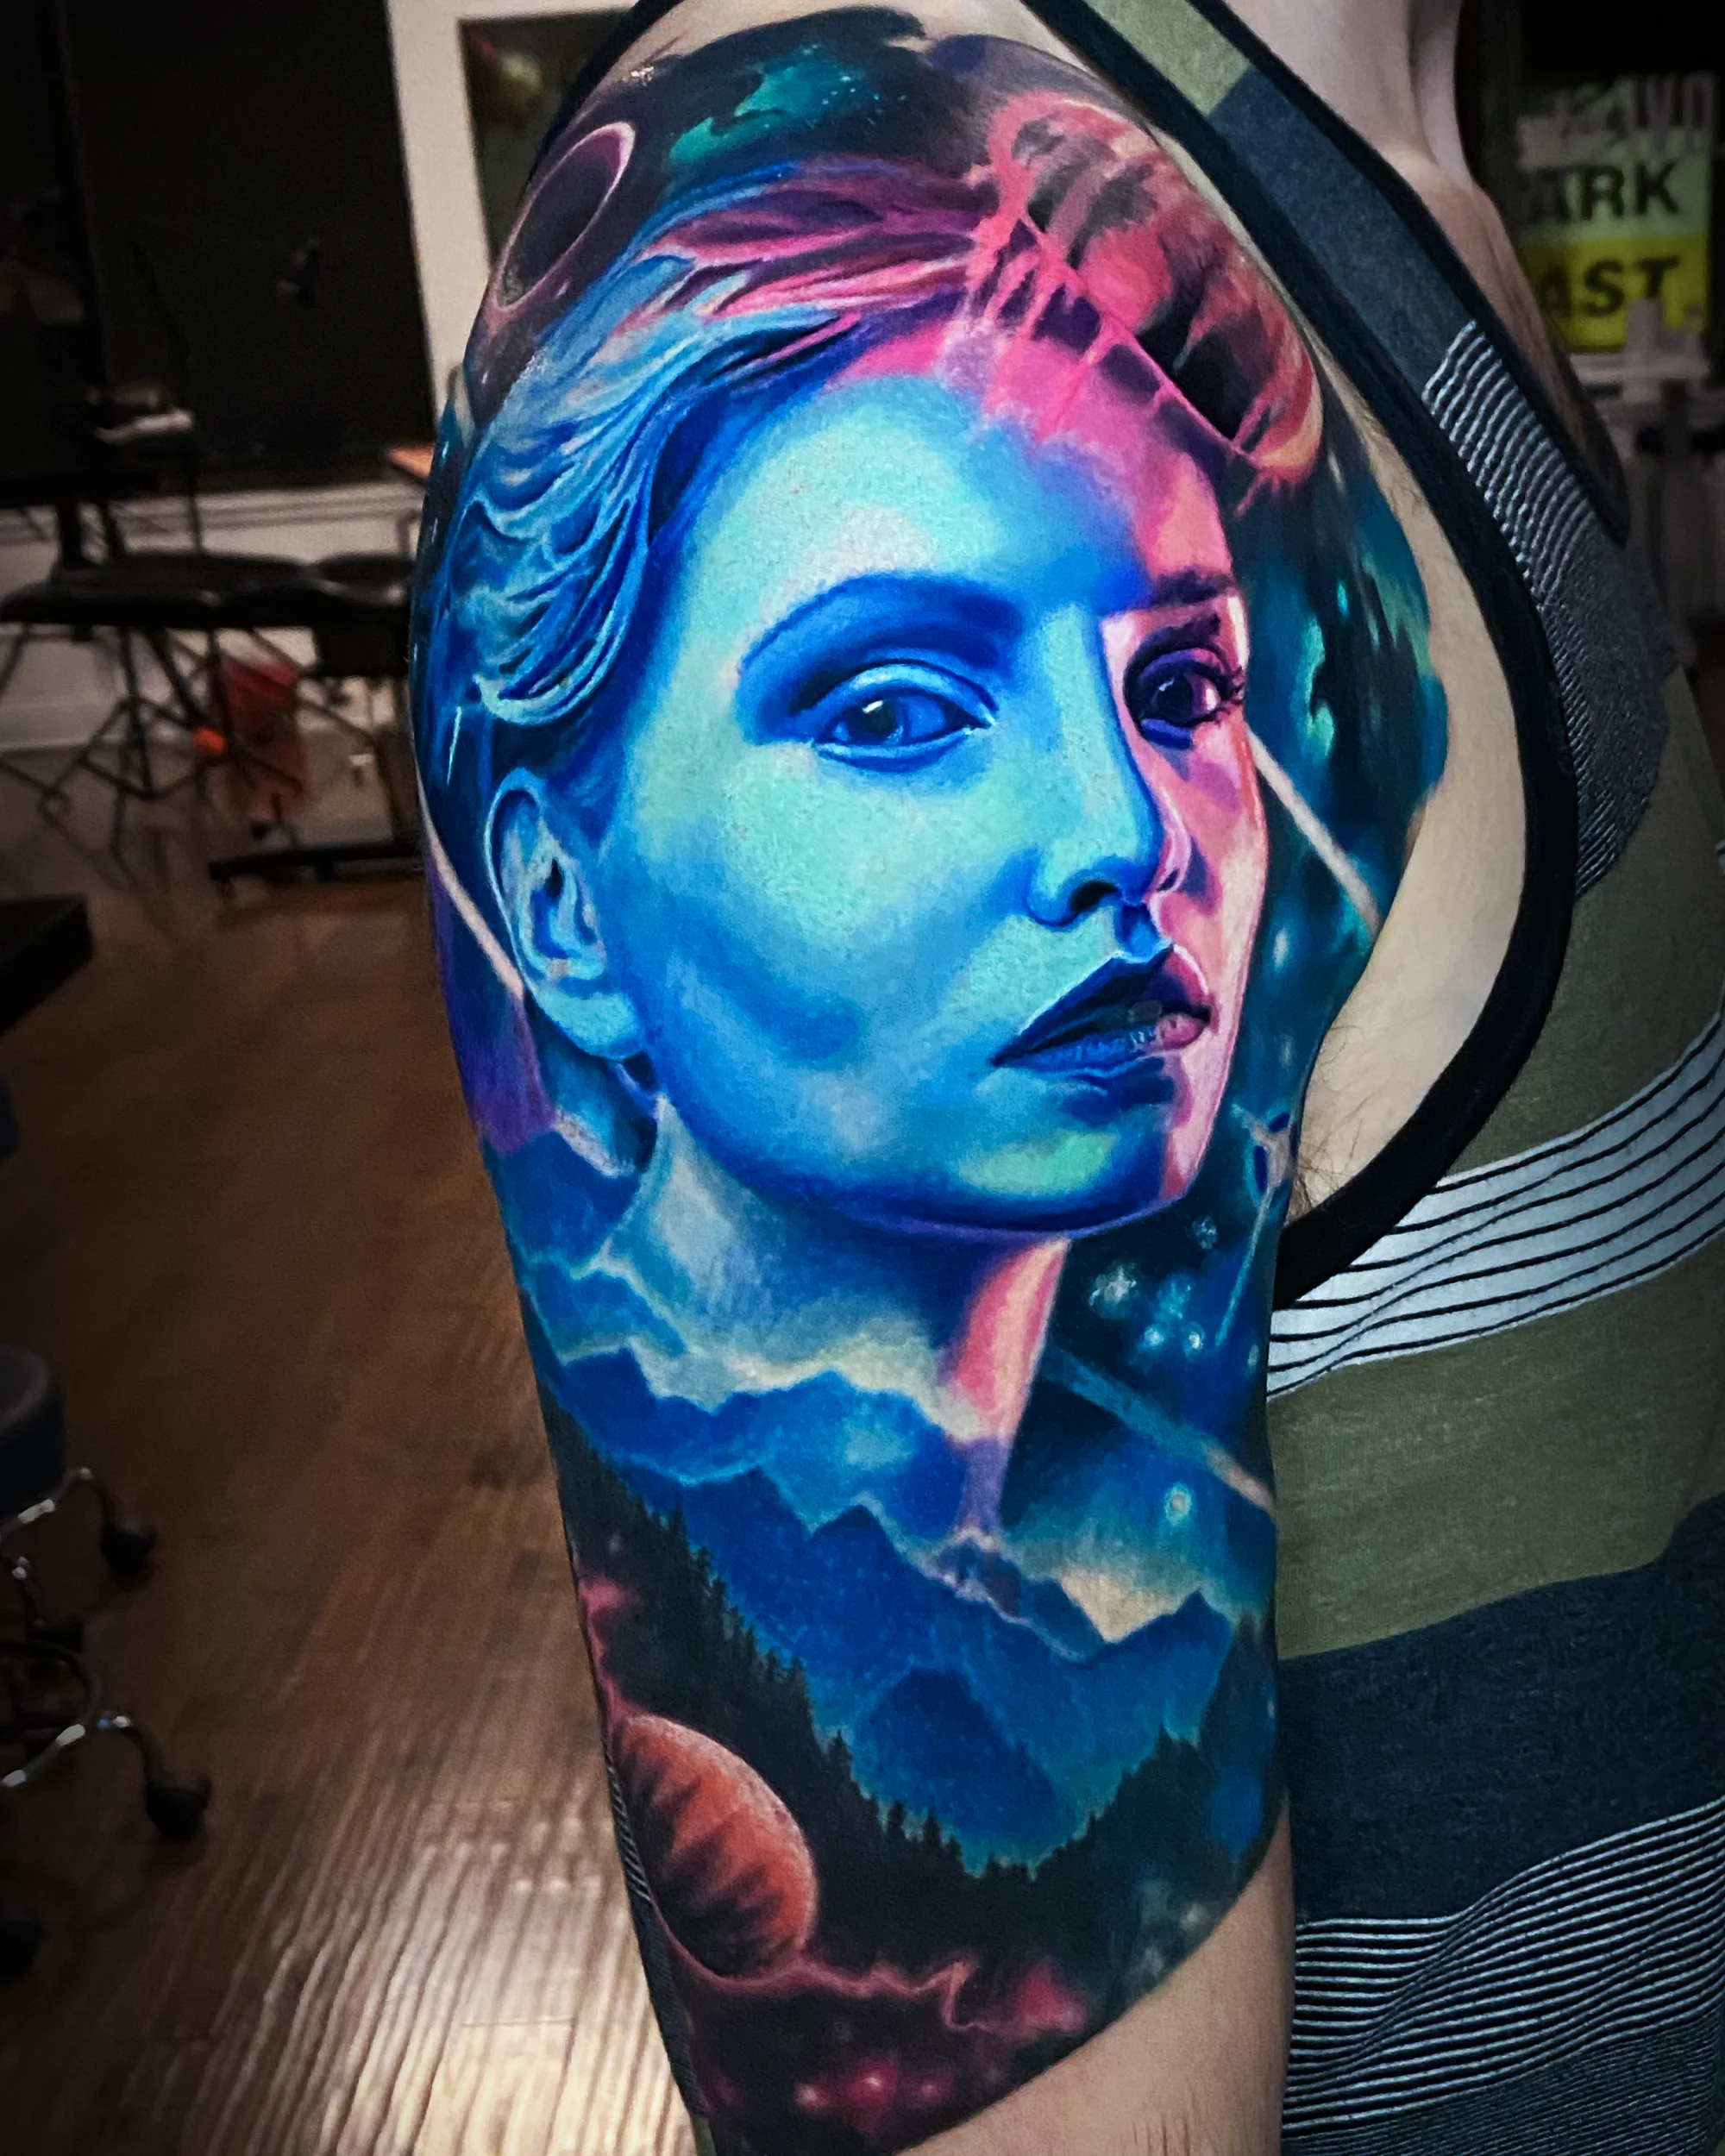
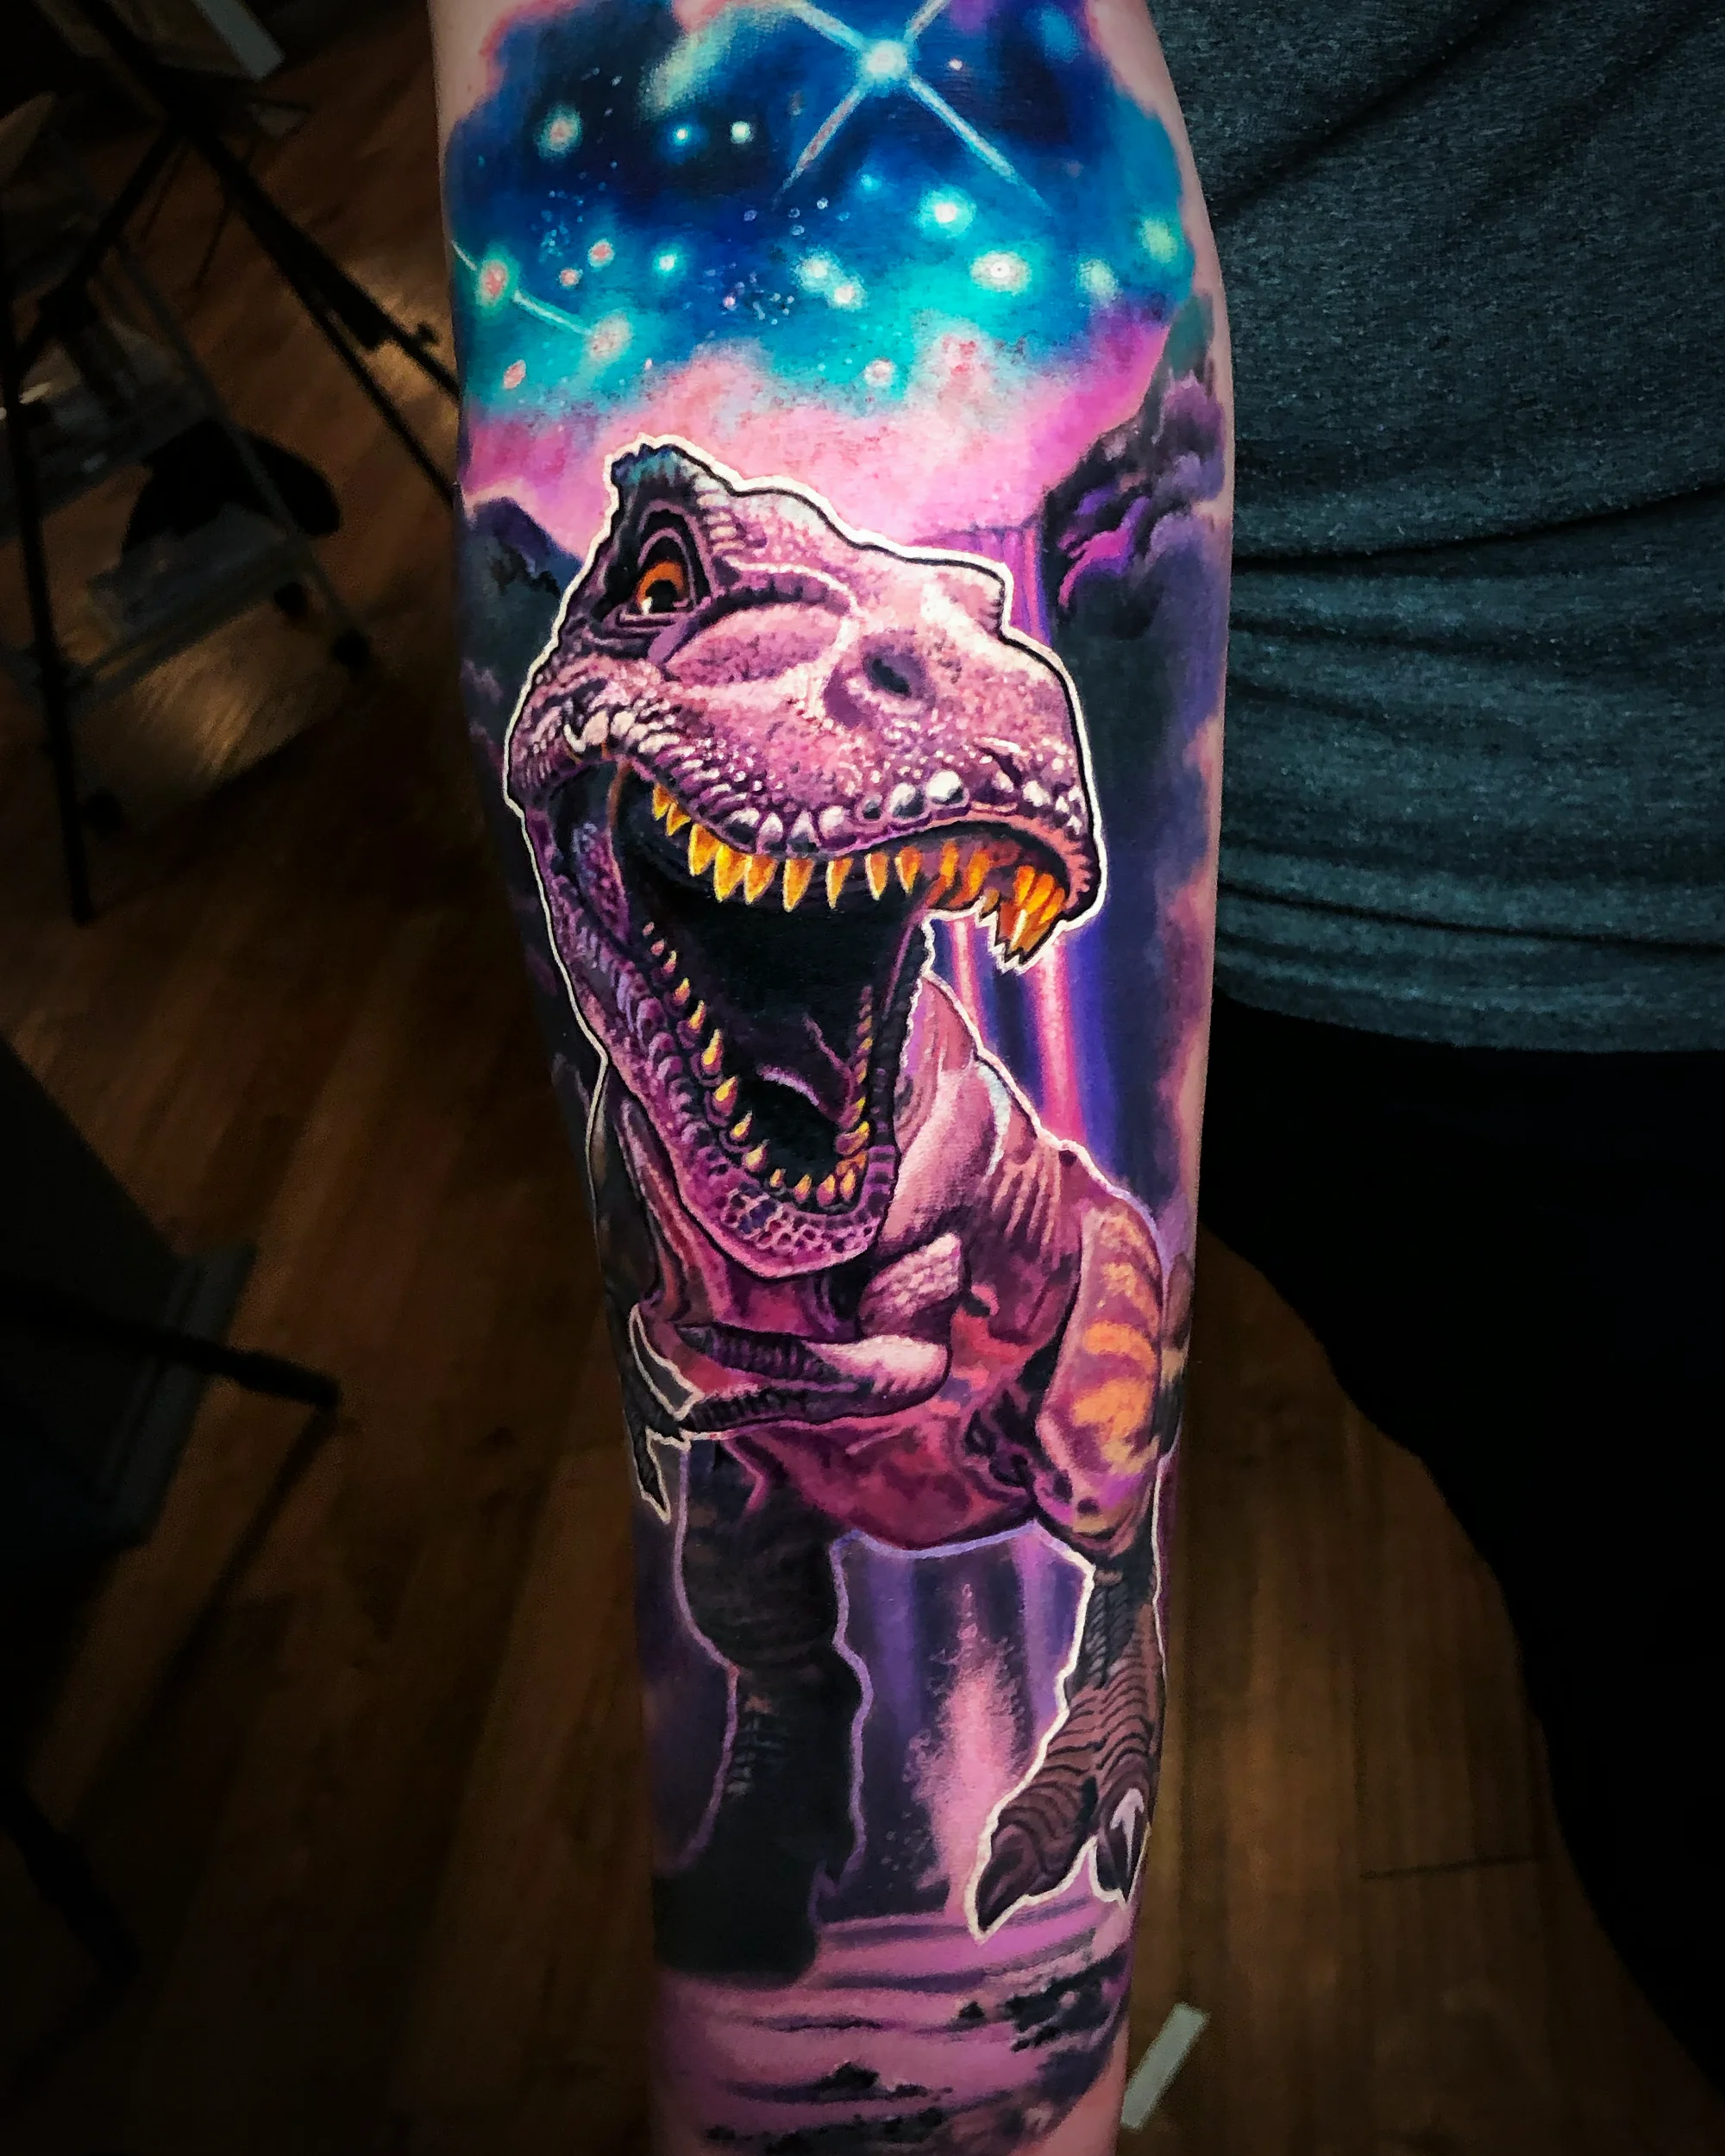
A significant number of my clients fly in from out of state. Some from the other side of the country, some from other countries entirely. The work justifies the trip — browse the portfolio to see why — but only if the logistics are handled right. Here's how to plan a travel session so nothing gets left to chance.
Start with the Booking Form
Every project starts the same way regardless of where you're located. Submit the booking form with your concept, references, and timing preferences. In the booking form, mark yourself as a traveling client and include your available dates and how many days you can be in Austin.
I review travel client inquiries with scheduling in mind (the FAQ covers common scheduling questions). If your piece requires two full-day sessions, I need to know whether you can do them back-to-back or if they need to be spaced across a return trip. That information shapes how the project gets planned.
Deposits and Commitment
Once a project is accepted, a non-refundable deposit secures your appointment and design time. For travel clients, this is especially important — the deposit locks in specific dates so you can book flights and accommodations with confidence.
The deposit amount depends on the scope of the project. It gets applied to the final cost of the work. I'll communicate exact amounts during the planning phase, before you commit to travel arrangements.
Session Scheduling
For travel clients, I structure sessions to maximize your time in Austin. That might mean:
- Consecutive day sessions for pieces that can handle back-to-back work
- Day-on, day-off scheduling for larger or more sensitive placements that benefit from a recovery day between sessions
- Single extended session for pieces that can be completed in one sitting
I'll recommend the right structure based on your specific project. Placement, size, and your pain tolerance all factor into how the schedule gets built.
What to Book
Flights: Austin-Bergstrom International Airport (AUS) is well-connected with direct flights from most major cities. Book flexible fares when possible — session timing occasionally shifts by a day for scheduling reasons.
Accommodations: Stay somewhere comfortable with good air conditioning. Austin in summer is hot. You'll want a clean, private space to relax after sessions. I'd recommend looking at the South Congress, East Austin, or Downtown areas for convenience.
Plan for downtime: Don't schedule your sessions on Day 1 of arrival. Give yourself at least a half day to settle in, hydrate, and acclimate — especially if you're coming from a different time zone. A rested body handles tattoo sessions significantly better.
What to Bring
- Loose, comfortable clothing appropriate for the tattoo placement
- Snacks and a water bottle for longer sessions
- Entertainment (headphones, phone, tablet) for multi-hour sessions
- Any reference images or notes we've discussed
- A positive attitude and realistic expectations about the timeline
After the Trip
Aftercare instructions go home with you — the Tattoo Prep Guide covers the essentials. Follow them. The investment you made in travel and the tattoo itself depends on proper healing — see the healed gallery to understand what properly healed color realism looks like. I'm available by email or DM for follow-up questions during the healing process.
If your piece requires additional sessions, we'll plan the next trip before you leave Austin. Many travel clients build their sessions around 2-3 trips spaced a few months apart. It becomes a routine — and some of my longest-running client relationships started exactly this way. For more details on how the full process works, and what to budget, those pages will fill in the rest.